Use the SynxML Platform
SynxML Platform is a high-performance distributed computing platform designed for enterprise-grade AI applications. It integrates the strengths of open-source technologies and enhances them with enterprise-grade features. The platform offers a complete end-to-end solution covering data preparation, feature engineering, model training, and production deployment.
Core features of SynxML Platform
Visual modeling: Offers an intuitive graphical interface that lets users train models by selecting algorithms, datasets, and setting hyperparameters. After training, models can be deployed as services with a single click. The platform also supports A/B testing and staged rollouts.
Notebook-based development: Comes with a built-in professional-grade Jupyter environment. Developers can write and debug Python code flexibly, enabling customization and experimentation with complex algorithms.
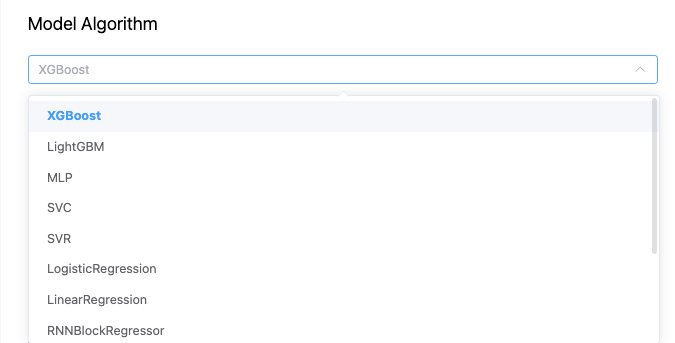
Algorithm and model library: Includes a rich collection of built-in algorithms such as Logistic Regression and XGBoost, deep learning models like MLP, ResNet, and Bert, and fine-tuning algorithms for large language models (supporting QLoRA and Unsloth). Users can also extend the library with custom algorithms.
Use cases for SynxML Platform
Private model training for enterprises: Enables organizations to train machine learning models on sensitive internal data without leaving the enterprise network. The platform ensures secure end-to-end management and high-performance training, helping businesses build accurate, compliant, and domain-specific models.
Fine-tuning large language models: Integrates efficient fine-tuning methods such as QLoRA and Unsloth to support popular LLMs. Enterprises can quickly adapt LLMs to specialized domains using few-shot learning, reducing training costs while improving task accuracy and semantic understanding.
Model deployment: Allows trained models to be deployed as RESTful API services in one click. It seamlessly integrates with business systems and supports A/B testing, phased rollouts, and auto-scaling to maintain stable performance under high concurrency.
Use the SynxML Platform console
Log into the SynxML console
After deploying the SynxML Platform (see Deploy SynxML Platform), open a browser and go to http://<node ip>:<port>/hp/. Enter your username and password, then click Login.
Tip
<ip>is the IP address of the machine running SynxML Platform.<port>is the service port configured in theservice_portfield of the/etc/synxml/platform.tomlfile.The default username is
admin, and the default password is alsoadmin.
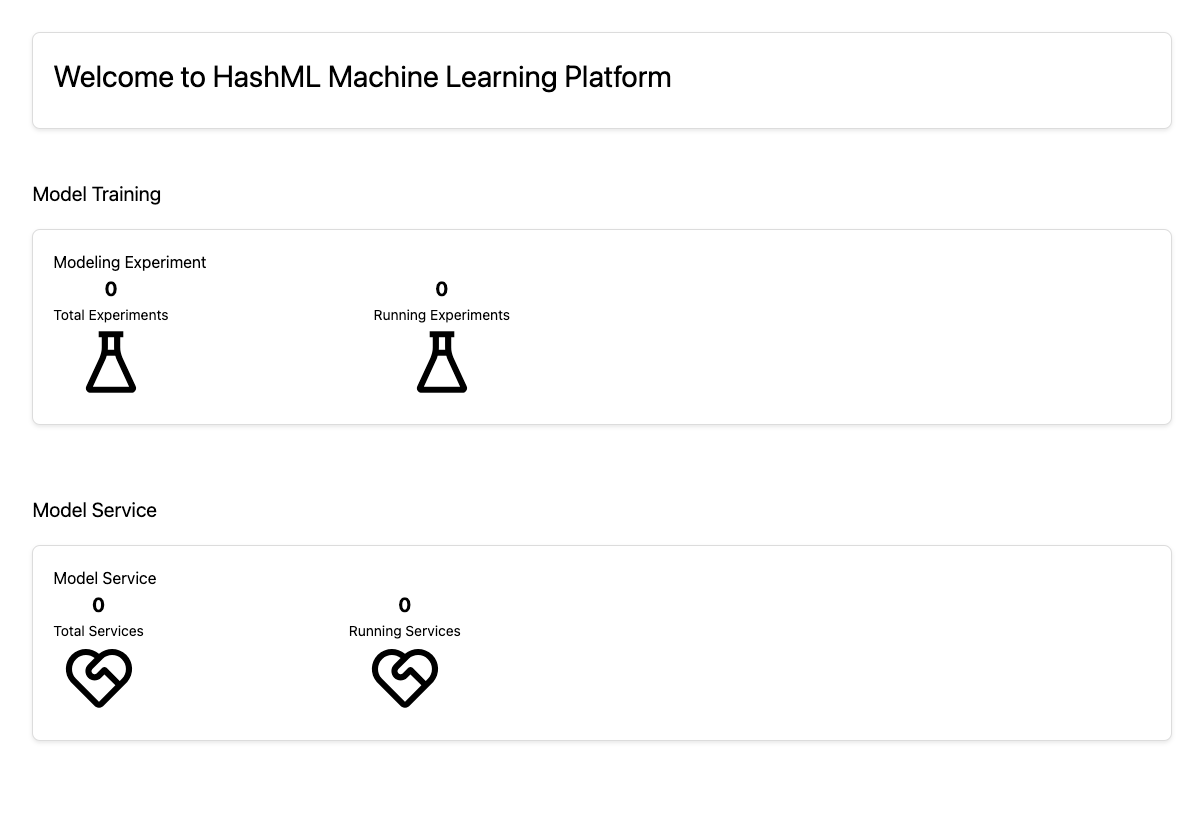
After logging in, you can see an overview of modeling experiments and model services on the Overview page.
Train a model
In the Model Training module in the left navigation menu, you can create training tasks, track their progress and status, and perform data insights.
Create a training task
On the New Task page, follow the instructions to fill in or select the required information, such as task name, model algorithm, training configuration, and description. Then click Create Task to confirm.
To view details about specific parameters, hover your mouse over the ? icon next to the parameter.
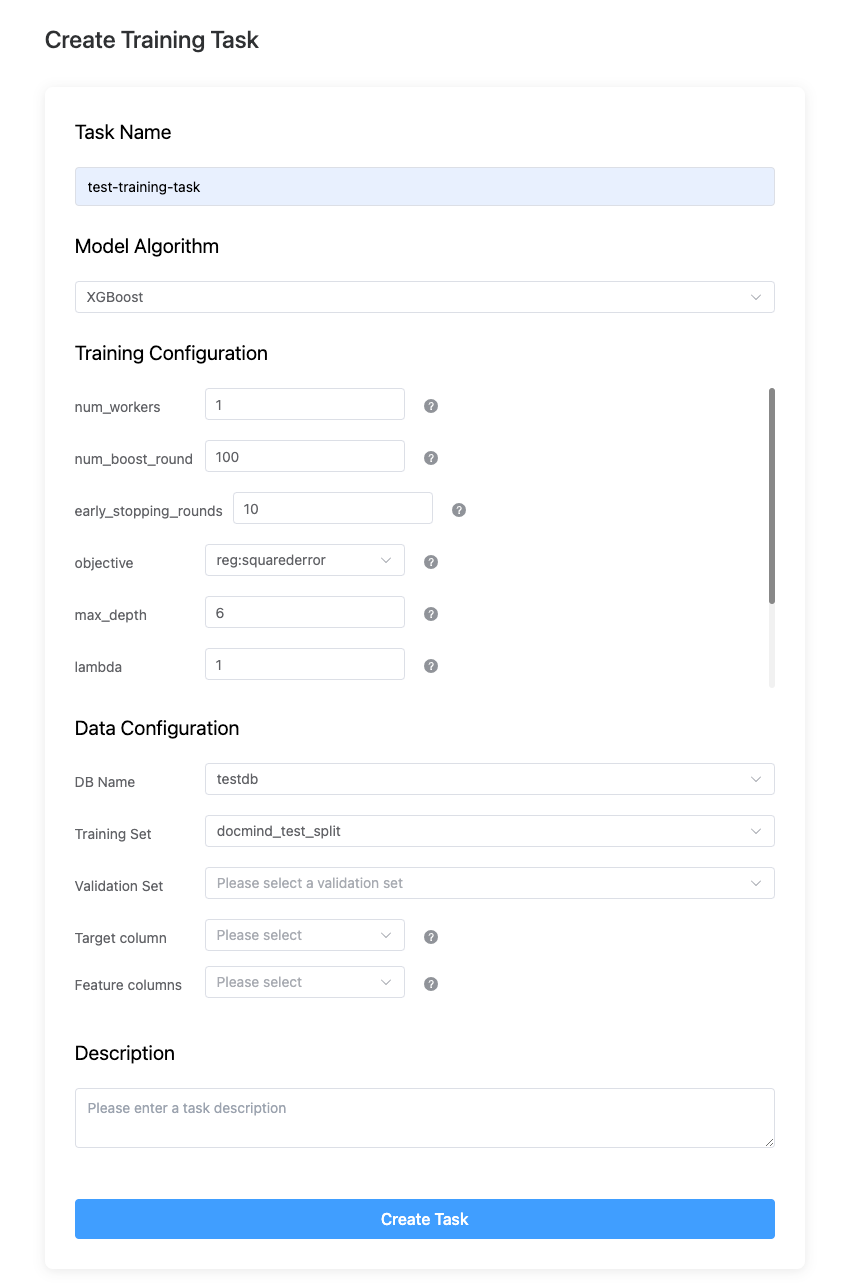
Once a task is created, you can check its status on the Task List page. After training is complete, you can deploy and manage the model in the Model Factory module.
View training tasks
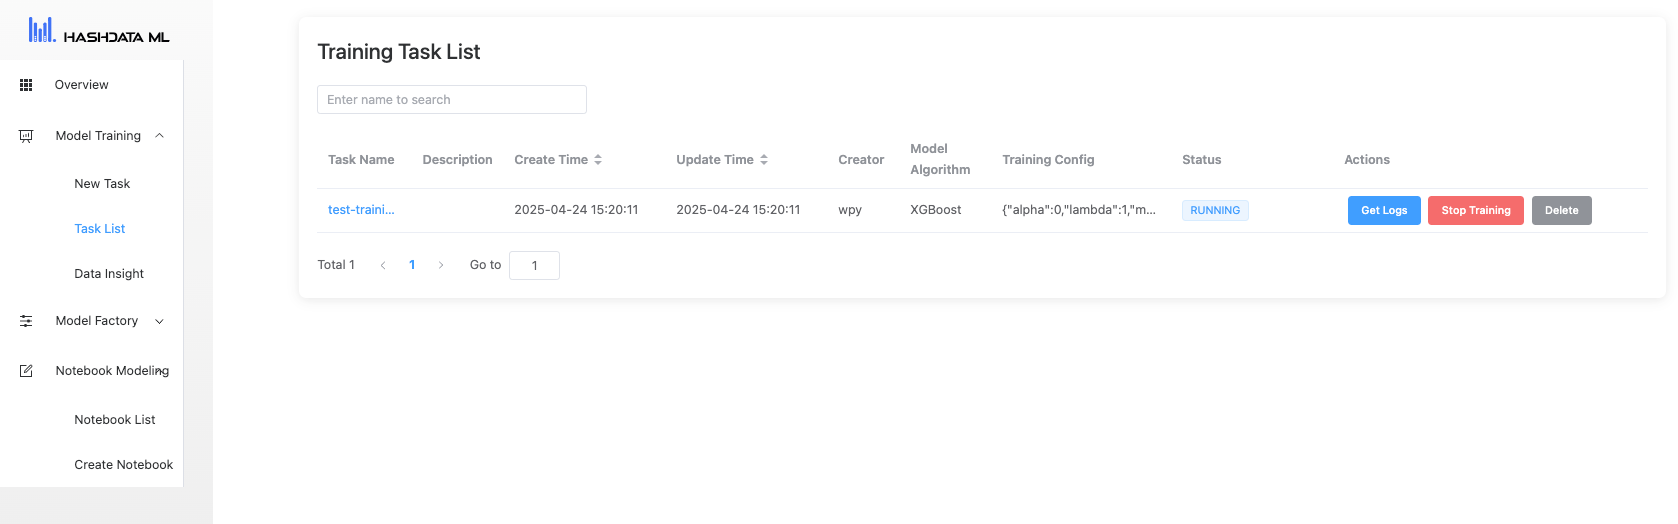
The Task List page displays all tasks. You can view detailed task information, including status, creation time, last updated time, creator, model algorithm, and more. Click Get Logs to see detailed logs for a task.
You can also stop or delete a task from this page.
Data exploration and insights
The Data Insight page provides visual data analysis tools.
Select a dataset.
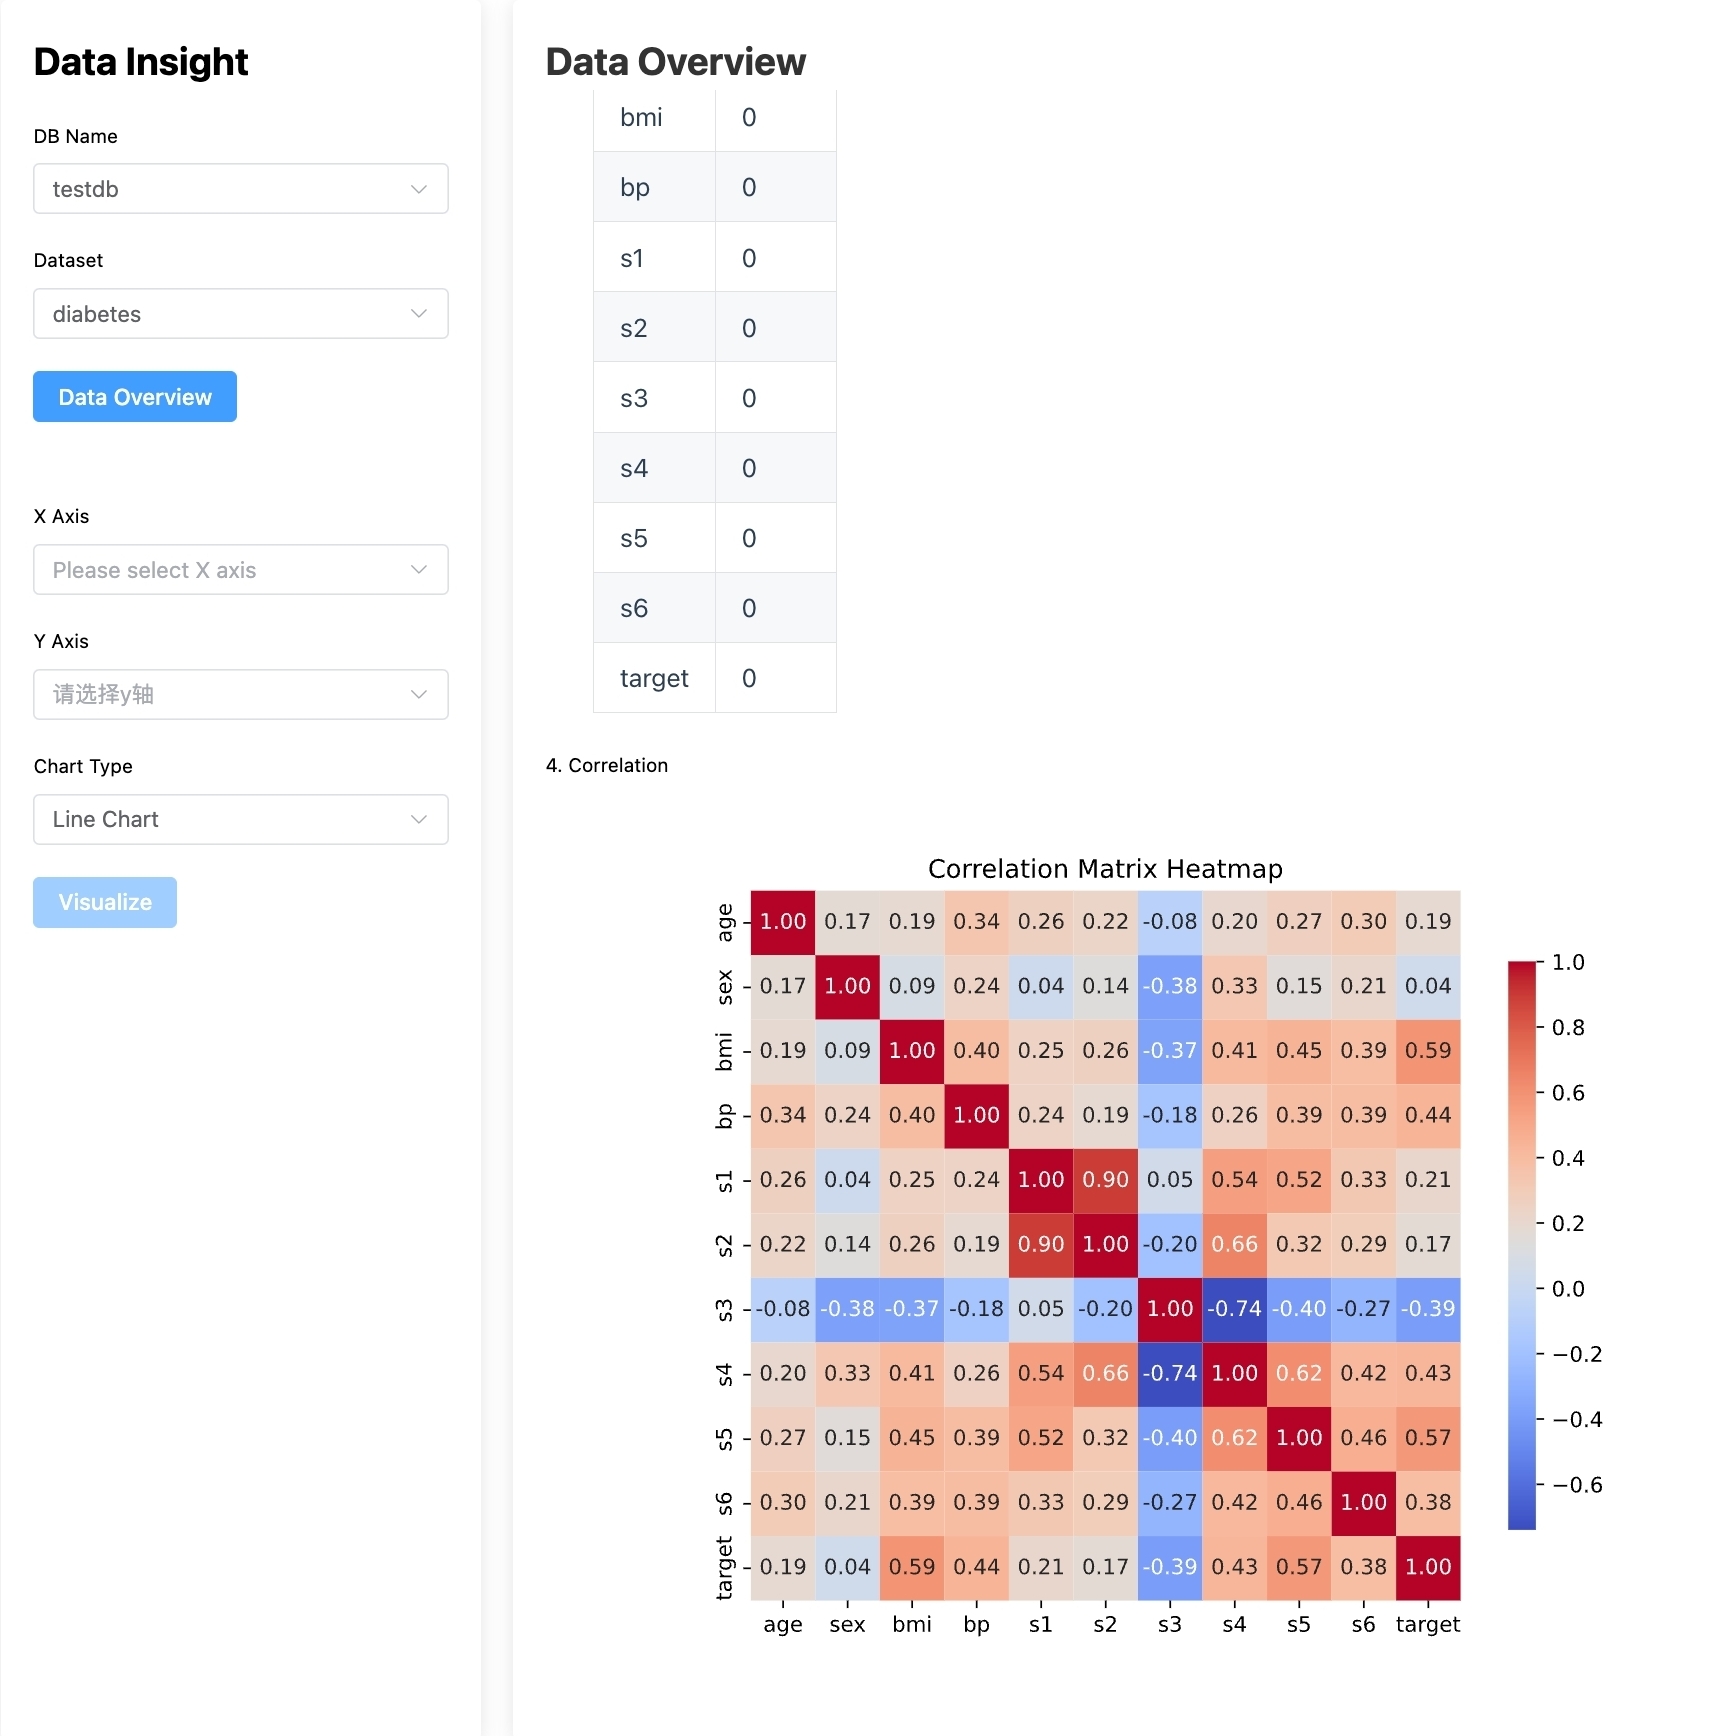
View dataset summary: Click Data Overview to see dataset characteristics such as data summary, statistical description, missing value report, and correlation matrix.
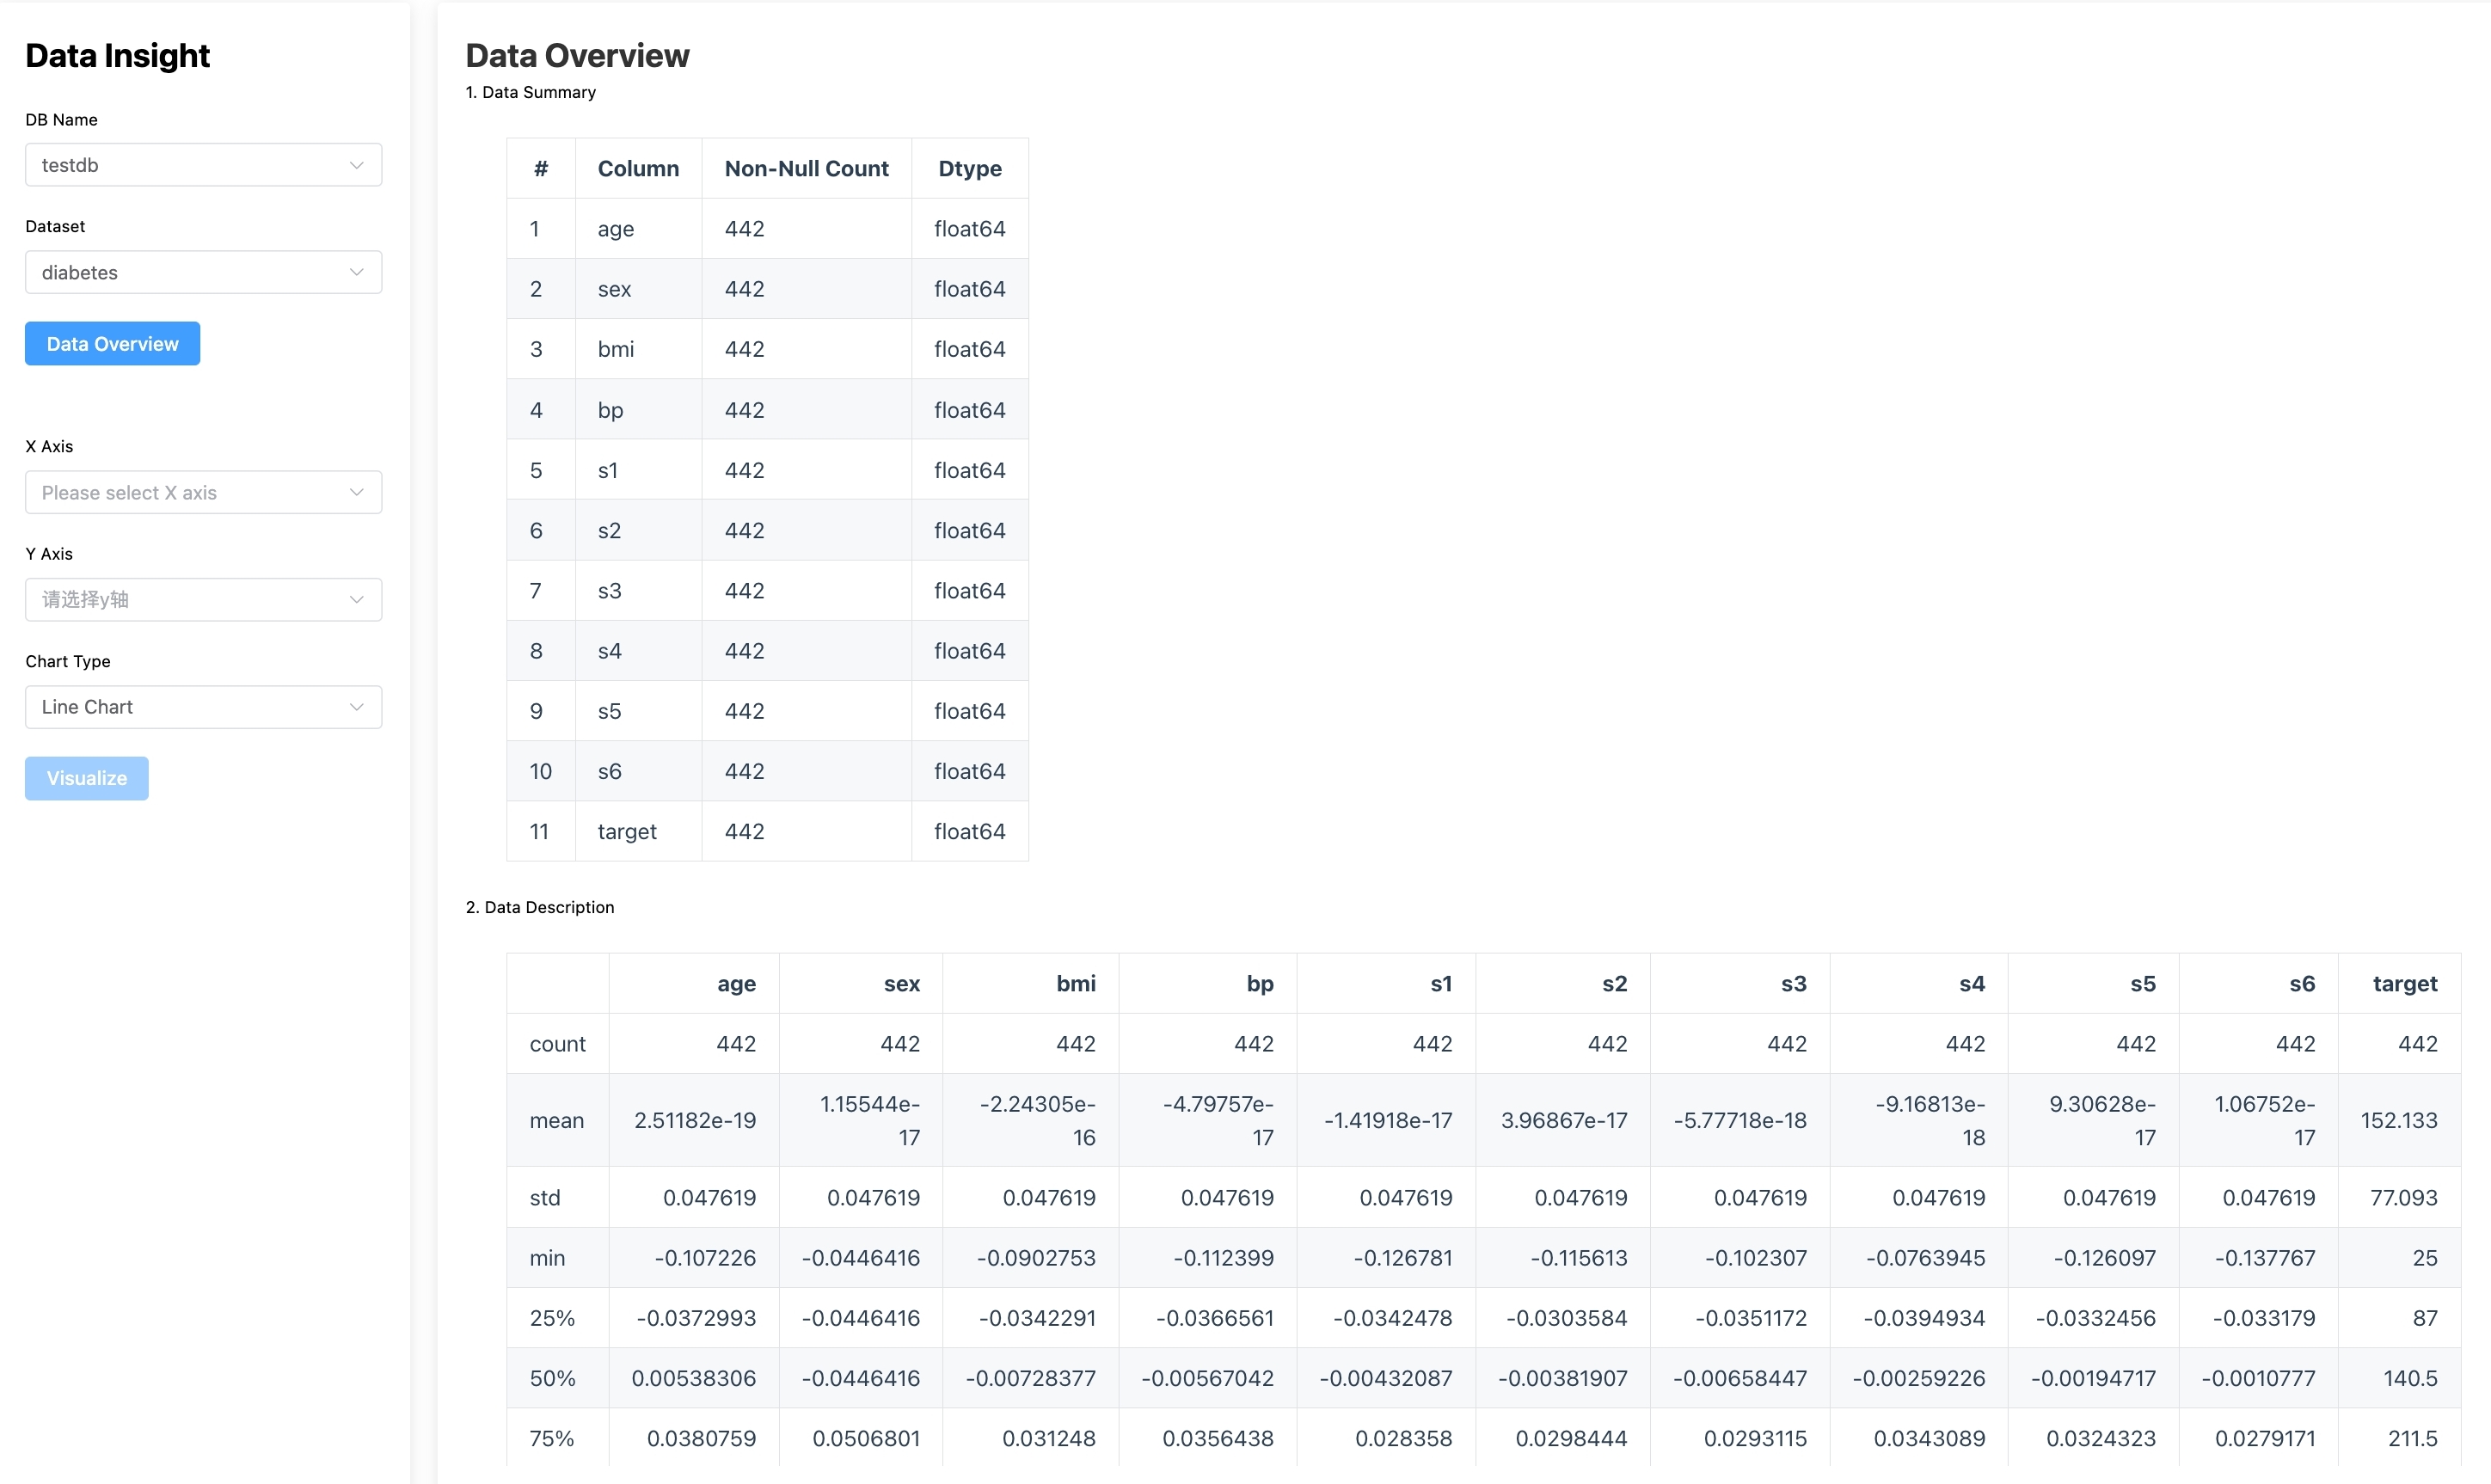
Visualize specific variables: Choose X-axis, Y-axis, and chart type, then click Visualize to explore selected data visually.
Model factory
The Model Factory module allows you to import external models, deploy them as services, and manage existing models.
Import a model
SynxML Platform supports importing models trained outside the platform.
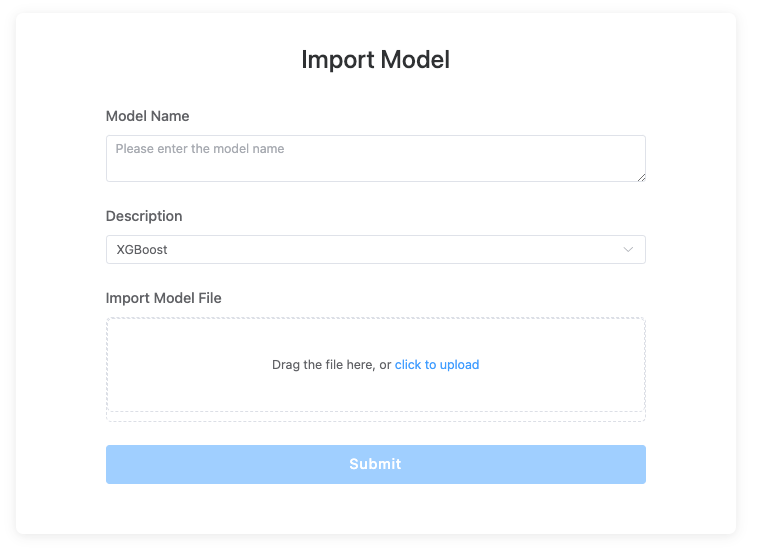
On the Import Model page, add a description for the model and select the corresponding algorithm.
Upload the model file by clicking or dragging it into the upload area.
Click Submit. The imported model will appear on the model list page.
Deploy a model
You can view existing models and deploy them with one click on the Model Factory > Model List page. The list displays model descriptions, creation and update times, source, algorithm, and other information.
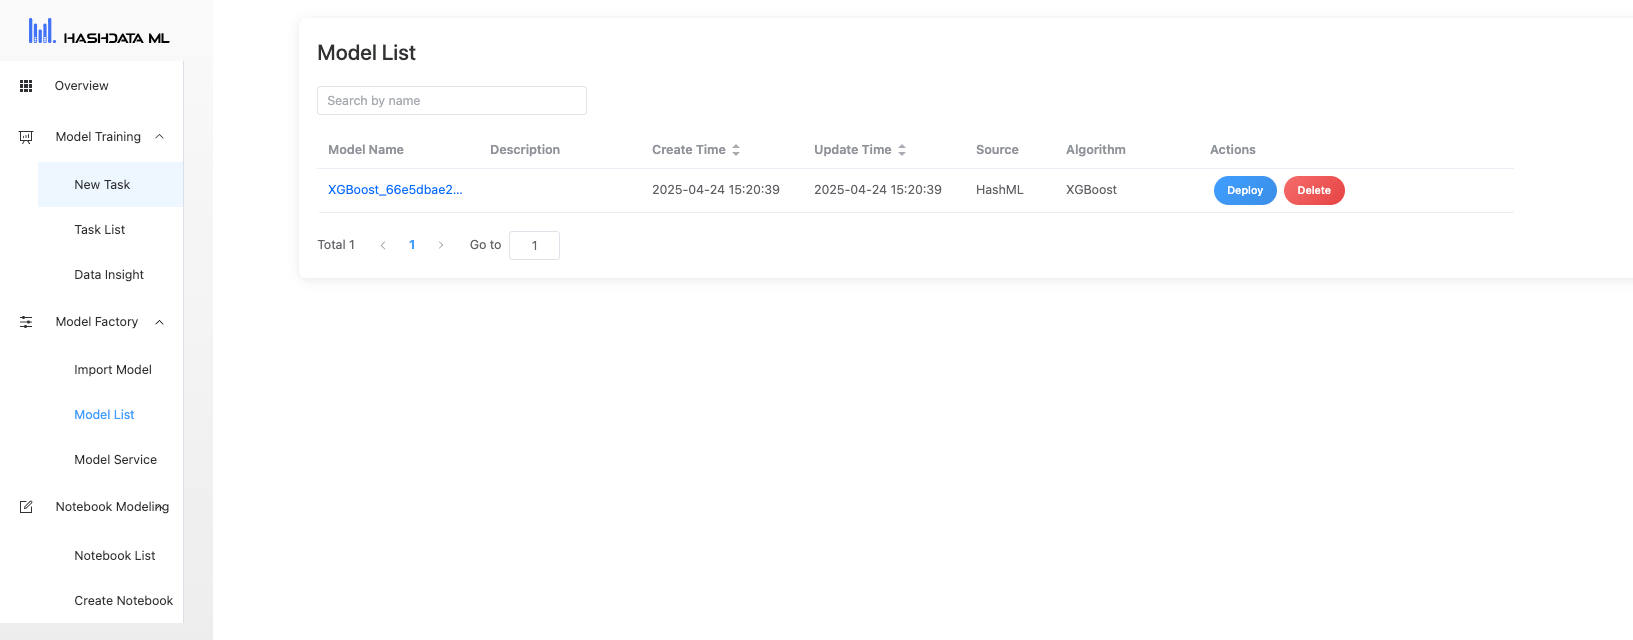
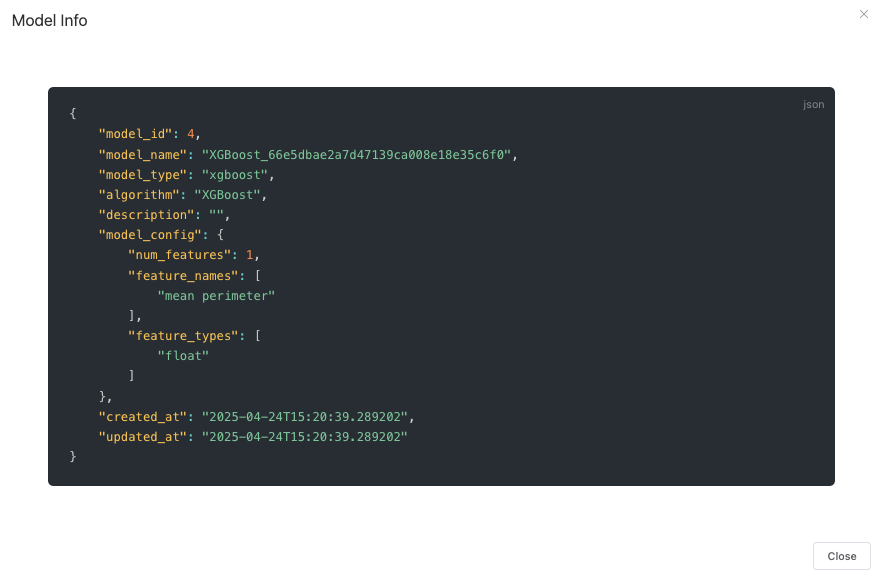
To view more details about a model, click the model name in the Model Name column to open a model card with additional information.
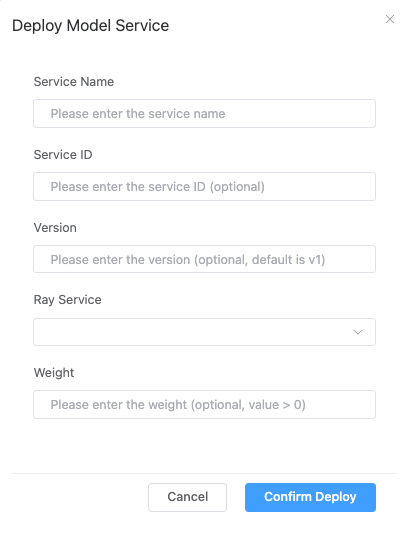
To deploy a model service, click Deploy:
Enter the model name, ID (optional), version (optional), and other relevant information.
Optionally specify the traffic ratio to assign to this model. For example, entering
40means the model will handle 40% of the traffic.Tip
This step allows you to define the percentage of online traffic that the newly deployed model will process. It is a key part of implementing a canary release strategy, which helps minimize risk by testing the new model with a small portion of traffic before full rollout.
For example, if you enter
40, the new model will handle 40% of incoming requests, while the remaining 60% will continue to be processed by the currently deployed model (if any). To route all traffic to the new model, enter100. To temporarily assign no traffic (for example, for internal testing), enter0.Click Confirm Deploy. You can also delete unnecessary models from the Model List page.
View deployed services
You can view deployed model services on the Model Services page.
To view detailed information about a service, click the service ID to open a service card, as shown below:

Use notebook-based modeling
SynxML Platform provides an interactive notebook environment for developing large models. In the Notebook Modeling module, you can create and manage notebooks.
Create a notebook
In the left navigatiob menu, go to Notebook Modeling > Create notebook.
Enter a name for the notebook, then click Create Notebook.
Manage and operate notebooks
In the left navigatiob menu, go to Notebook Modeling > Notebook List.
Locate the target notebook in the list, then click Open or Delete as needed.
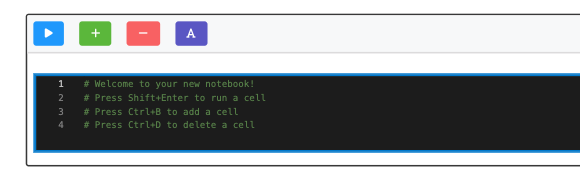
After opening a notebook, use the buttons in the upper left corner of the editor to perform operations: